Content Marketing vs. Paid Advertising. Which is better for your business?

Blue Swing Media • August 28, 2019

Pros and Cons of Content Marketing and Paid Advertisements

There are many challenges that come with being a business owner and a marketer. One of the main ones is the challenge of expanding the reach of your business, improving brand awareness, and building a bottom line.

You have two main choices for this; content marketing and Pay-Per-Click (PPC) marketing.

Content marketing appears to be the better choice if you just look at the stats;
  • Content marketing offers website conversion rates of almost 6x what other marketing methods get.
  • On-page content remains the most effective SEO technique around.
  • Marketers say that branded content initiatives are more effective compared to advertising on magazines and TV, through direct mail, or through PR.
Paid Ads has benefits too though; the main one being that it gets you to the top of SERPs (Search Engine Results Pages), putting you in front of the right people at the right time.

Is the initial cost of PPC worth the return on investment though?

If you aren’t sure what to do, then just relax. There has never been a simple and straightforward answer to the question of whether content marketing or PPC is the right choice.

We’re here to help you understand the choices. Let’s consider the pros and cons of both forms of marketing. You’ll have the information you need to choose which one is right for you depending on your brand, target audience, and situation. 

Let’s assess the pros and cons of content marketing vs PPC to see if there’s a clear winner.

Content Marketing Pros and Cons
Content marketing is a lower cost solution that improves website visibility, but it takes time to be really effective. It’s good choice for better conversions and higher quality leads if you have the time, money, and patience to go with it.

Here are more pros and cons of this marketing method:

1. Con – Content Marketing Takes Longer to Generate Healthy ROI 

  • It takes a real commitment to stick with content marketing. You won’t notice any real results until several months after publishing content. 
  • The good news is that the ROI comes hard and fast once it does come in. 
  • HubSpot estimates that old blog posts about evergreen topics account for up to 38% of all internet traffic. The posts you made months ago will eventually start bringing in a target audience and climbing the rankings. 
  • It takes some time for content marketing to build up momentum, but it’s impossible to stop once it does. 

2. Pro – You Get Better Leads 

  • You’ll find that the leads you generate through content marketing – once it starts generating leads – are much higher quality than you get with PPC. 
  • Marketing Sherpa suggest that organic search traffic generates the highest volume of leads and highest conversion rates. PPC comes in third for both of those metrics, just behind traditional email marketing. 
  • A high quality lead is more likely to buy your products, and content marketing is better at bringing them in. 

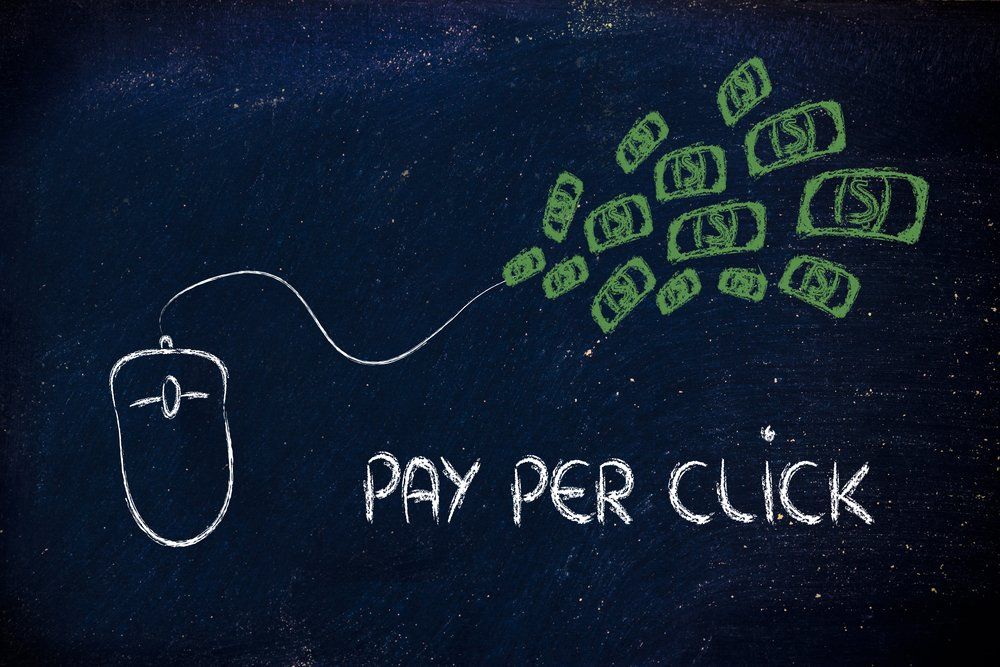
3. Pro – More Cost Effective 

  • What’s great about content marketing is that the costs associated with it are a single investment. Just pay the upfront costs and you’re golden. 
  • Once the content is published it climbs the ranks in search results, generating clicks and leads without you having to pay another penny. 

4. Con – It can be Difficult to Find Good Content Creators and Writers 

  • Good help is hard to find, especially with writers. It also takes time to properly vet a writer for yourself and assess their skills and compatibility with your brand. 

5. Pro – Content Agencies Exist for This Very Reason 

  • Don’t worry too much about finding content creators though. Content agencies have done all the hard work for you. They can match you up with a good writer who can fit your brand voice and take care of writing content for you. 
  • Agencies have expectations for their creators, including their ability to research and write good content. You can be sure that you’re getting someone worthy of your time and money. 
Paid Advertising Pros and Cons
PPC offers targeted reach and immediate visibility. One thing that Ads offer is the ability to block fraudulent clicks through Google Ads. You can protect your ads against bots, click farms, competitors, and other click fraud. It’s simple to set up and get started with Google Ads. Let’s look at the other pros and cons of PPC.

1. Con – Paid Ads Takes More Money & More Time Than You Think 

  • It’s virtually impossible to maintain a good long-term PPC strategy if you aren’t drowning in money. This is because you are charged whenever someone clicks on the SERP listing.
  • If you want to generate more traffic and be at the top of the results, you’ll have to pay a lot of money just to keep a visible presence on Google. 

2. Pro – PPC Literally Takes you to the Top 

  • If you need to get to the top of search results instantly, then you need PPC. Google AdWords lets you put down a bid on your keyword. If the page is relevant enough and your bid is high enough, Google puts you right on top of their results. 
  • You get incredible visibility through PPC. The traffic generated by being on top of results could make up for the cost of getting there in the first place. 

3. Con – The Visibility Vanishes as Soon as You Stop Paying 

  • The biggest drawback of PPC advertising is that you disappear from the top spot as soon as you stop paying to be there. This is much different from content marketing, where you slowly but surely climb your way to the top of SERPs. 
  • With content marketing, your ranking never disappears as long as it stays relevant, and you’ll never have to pay another penny to stay there. 

4. Pro/Con – Ads Are More the More Affordable Choice for Some Industries 

  • The amount that you pay per click with PPC ads can vary between different industries. Some industries – such as legal – will have greater competition for their keywords. If you were in a business like education, employment, or ecommerce though, then PPC can be much more affordable. 
  • On average, PPC costs around $2.32 per click. That’s much more affordable than the $5.88 per click for the legal industry. That’s the average too, it might be cheaper for your industry. 
Which One is Best?
Content marketing is about creating content to build trust and loyalty with a target audience. This will eventually come back in the form of increased profits.

PPC advertising is about paying to get a prime spot in search engine results pages to generate a lot more traffic. You’ll have to pay each time a visitor clicks on your link.

There are pros and cons to both of these methods, but you can’t choose one over the other. It always helps to diversify your strategy a bit.

Content marketing and Paid Ads are both situation-specific solutions. There may come a time when you need the immediate visibility and power that PPC offers so more people reach your content. Just make sure it’s good content though, or you’ll never get any conversions.

At the same time, you need to have great stable content that climbs the SERP ranks and generates a continuous return on investment over time.

You may notice both of those strategies require a strong foundation of valuable content. PPC can’t generate conversions for you, but content marketing can.

All in all, content marketing has the edge over ads. It offers a better return on investment and offers long-term results. With that said, there are definitely benefits to digital advetising. It’s great for immediate visibility and getting your content in front of an audience as soon as possible.

Which one is right for you depends on your situation, but you should certainly consider using both. The pros of each account for the cons of the other. 

Share

By Joel Conner February 2, 2026
If you’re a real estate agent or broker, you’ve probably heard of Go High Level. You may even know it’s “powerful” and “can run your whole business” — but when you log in, it feels like a cockpit. Dozens of features, endless menus, and no clear roadmap for what you actually need to use. The good news: as a real estate professional, you don’t need everything. You just need a few core pieces set up correctly: A simple pipeline that matches how you work Automated follow-up so no lead slips through the cracks Smart tagging and routing so leads go to the right place Appointment reminders that reduce no‑shows Easy open house and offer follow-ups Basic dashboards so you can see what’s working In this guide, we’ll walk through how to set up Go High Level for a real estate business step by step — and how to use it without getting buried in complexity. Why Go High Level Is a Good Fit for Real Estate Go High Level (often written as GoHighLevel or GHL) is an all‑in‑one platform that can: Capture leads from forms, funnels, and ads Store and organize contacts like a CRM Automate follow‑ups via email, SMS, and even ringless voicemail Track deals in pipelines Book and manage appointments Build simple landing pages and funnels For real estate agents and brokers, that means you can: Respond instantly to new leads Keep track of buyers and sellers by stage and property Follow up after open houses Send appointment reminders automatically Stay on top of which leads came from where You don’t have to use every feature. If you focus on a handful of essentials, you’ll get real value quickly — and you can grow from there. Step 1: Start With a Real Estate Sub‑Account and Snapshot Go High Level lets you create sub accounts — essentially separate spaces for each business. If you’re just getting started: Go to your Agency account. Click Sub accounts in the left menu. Click Create sub account . Search for Real Estate snapshots. You’ll see options like: Real Estate Agent Real Estate Broker Pick the one that matches you best. These snapshots come preloaded with: Real estate pipelines Basic automations Landing page templates Then: Add your business information (address, name, etc.). Click Add sub account . Switch into it with Switch to sub account . This gives you a solid starting point tailored to real estate rather than a blank, generic setup. Step 2: Build a Pipeline That Matches Your Real Estate Workflow Your pipeline is where you visually track deals from “new lead” to “closed.” The real estate snapshot usually includes a default pipeline with stages like: New lead Hot lead New booking Visit attended Deal Left a review You can keep this, or you can create your own so it reflects how you actually work. How to Create a Custom Pipeline Go to Opportunities . Click Pipelines . Click Create pipeline . For a buyer pipeline , for example, you might set stages like: New lead Contacted Appointment set Showing Offer made Closed For a seller pipeline , you could have: New listing Photos taken On market Offer received Sold Name the pipeline and click Create . Then, in the top left, switch to your new pipeline to start using it. Tip: If you work with both buyers and sellers, create separate pipelines. It keeps your view clean and makes follow‑up easier. Step 3: Automate Lead Follow‑Up So You Respond Instantly This is where Go High Level really shines. Most agents lose business not because they don’t get leads — but because they don’t follow up quickly or consistently. With Go High Level, you can create workflows that: Trigger when a new lead comes in Send an immediate SMS and/or email Add the lead to a pipeline Assign it to an agent Continue nurturing over days or weeks Start with a Simple New Lead Workflow Go to Automations → Workflows . Click Create workflow → Start from scratch (or use “New Lead Nurture – Fast 5” as a base). Add a trigger , such as: Form submitted (for website or funnel forms) Facebook lead form submitted TikTok form submitted LinkedIn lead form submitted New contact created Appointment booked If you’re using a standard Go High Level form, choose: Trigger: Form submitted Filter: Form is [Your Buyer/Seller Form] Once you’ve set your trigger, add actions like: Create/Update Contact – to ensure the lead is saved properly Add to Pipeline – put them into the “New lead” stage of your buyer or seller pipeline Send SMS – something friendly and immediate, like: “Hi {{contact.first_name}}, thanks for reaching out about homes in {{location}}. Would you like to schedule a quick call to talk about what you’re looking for?” Send Email – a slightly more detailed introduction and next steps Wait steps and If/Else conditions – for follow‑ups based on whether they reply You can also use the prebuilt New Lead Nurture (Fast 5) workflow in Go High Level. It typically: Triggers when someone submits an offer form or Facebook lead form Creates a new opportunity in the New lead stage Sends a conversational email and SMS Waits for replies Moves leads to Hot lead if they reply Triggers call connect actions This is a great starting point if you don’t want to build from scratch. Step 4: Auto‑Tag and Route Your Leads for Better Organization Once leads are flowing in, you want them automatically: Tagged (e.g., buyer, seller, rental, luxury, open house) Routed to the right pipeline and agent This keeps your database clean and makes it easy to run targeted follow‑ups. Tagging Leads Based on Forms and Sources Say you have different forms: Buyer form Seller form Open house form Free home valuation form You can: Use a trigger like Form submitted or Facebook lead form submitted . Filter by specific form. Add an action: Add contact tag . Useful tags might include: Buyer / Seller Rental Luxury listing Came from Facebook Came from Google Open house – 123 Main St Free home valuation With these tags in place, you can quickly filter contacts, build targeted campaigns, or trigger routing automations. Routing Leads to the Right Agent You can also route leads based on tags. Example: all Buyer leads go to your buyer’s agent. Create a new workflow with trigger Contact tag . Filter: Tag added is Buyer. Add action: Assign to user . Choose the agent responsible for buyer leads. You can set up similar workflows for sellers, rentals, or specific property types or locations. This way: Facebook buyer leads go straight into your buyer pipeline Seller leads go to your listing pipeline Agents see only the leads they’re responsible for No manual sorting. Less confusion. Faster response times. Step 5: Set Up Appointment Reminders to Reduce No‑Shows Once you’re booking showings and consultation calls, appointment reminders can dramatically reduce no‑shows. Create a Calendar in Go High Level Go to Calendars → Calendar settings . Click New calendar . Choose the calendar type: Personal booking – for one agent Round robin – for multiple team members Class booking – useful if you want a “group” appointment (e.g., open house time slots) Name the calendar (e.g., “Buyer Consultation,” “Listing Appointment,” “Property Showing”). Add team members if using round robin. Set: Meeting duration Bookable times Buffer times between appointments Then, connect it to your personal calendar: Go to Connections Click Add new Connect Google Calendar, Outlook, iCloud, or Calendly Now, when someone books through this calendar, it automatically shows up in your personal calendar. Use Automated Confirmation and Reminder Workflows Go High Level usually includes a workflow like “Appointment Confirmation and Reminders.” This can: Trigger when an appointment is confirmed Update the opportunity stage to something like Appointment set Send a confirmation email: “Hi {{contact.first_name}}, your appointment has been confirmed for {{appointment.start_date}} at {{appointment.start_time}} {{appointment.time_zone}}.” Send reminder emails: 24 hours before 1 hour before Send SMS reminders (e.g., 1 hour before) If someone doesn’t show, another workflow can trigger on Appointment status: No show and: Send a link to reschedule Follow up again after a day This combination keeps your calendar fuller and minimizes missed opportunities. Step 6: Automate Open House Follow‑Ups Open houses are great for collecting warm leads — but those leads often go cold if you don’t follow up quickly and consistently. Go High Level makes it easy to: Capture visitor info Tag them based on the specific open house Send personalized follow-ups with similar listings or next steps Create a Simple Open House Form Go to Sites → Forms → Form builder . Build a form that collects: Name Email Phone What they’re looking for (beds, baths, budget, area) You can use this: On a tablet at the open house As a QR code link (visitors scan and fill it out on their phone) Embedded on your website As part of your Facebook lead ad form that’s integrated into Go High Level Automate the Follow-Up Use a Form submitted trigger for your open house form. Add an action to Add contact tag , e.g.: Open house – 123 Main St. Add actions to: Send an immediate “Thanks for stopping by” email or SMS Include links to similar listings or next steps Add them to a Warm leads pipeline Set reminders for follow‑up calls or texts Example SMS: “Hi {{contact.first_name}}, thanks for visiting the open house at 123 Main St today. I’ve got a few similar properties you might like — want me to send them over?” This simple automation helps you stay top‑of‑mind and turn casual open house visitors into real opportunities. Step 7: Use Dashboards to See What’s Working (and Fix What Isn’t) Once everything is up and running, you don’t want to guess how it’s performing. Check your Dashboard or Reports in Go High Level regularly (weekly works well). You can see: How many leads are coming in Which sources (Facebook, Google, website, open houses) are performing best How many leads are moving from stage to stage in your pipeline Where deals tend to get stuck From there, make small tweaks like: Adjusting the delay between follow‑up messages Refining your SMS and email templates Changing which tags trigger which workflows Fine‑tuning your pipelines or reminders Often, small improvements in timing or messaging can significantly boost your response rates and conversions. Bonus: Simple Funnels and Offers for Real Estate You don’t need complex funnels to generate leads. Go High Level snapshots for real estate often come with ready‑made pages like: Free home valuation offer Home buying consultation Seller consultation For example, you could: Run Facebook ads to a free home valuation landing page Collect details through a form Tag those leads as Free home valuation Trigger an automation that: Reminds you to prepare the valuation Sends a follow‑up message to schedule a consultation Adds them to a seller pipeline This turns a simple offer into a structured system that consistently feeds your business. Keep It Simple, Then Grow Go High Level has dozens of features — social planners, reputation management, and more — but you don’t need all of them on day one. If you’re a real estate agent or broker, start with: A buyer and/or seller pipeline New lead follow‑up workflows (email + SMS) Tagging and routing rules Appointment calendars and reminders Open house follow‑up Basic dashboard checks Once those are in place and working, you can gradually add: Social media scheduling Review generation (reputation management) More advanced campaigns and funnels The goal isn’t to use every feature — it’s to build a system that quietly saves you hours each week and helps you close more deals.  Need Help Setting This Up? If you’d like to use Go High Level (or any CRM/automation system) but don’t have the time or desire to configure it yourself, Blue Swing Media can help. We work with small businesses and local service providers — including real estate professionals — to: Set up practical, easy‑to‑use pipelines Build automated follow‑ups that feel personal, not spammy Connect your website, ads, and forms so every lead is tracked Create landing pages and offers that actually convert If you want a real estate system that runs smoothly in the background while you focus on serving clients, reach out to Blue Swing Media. We’ll help you implement the strategies in this guide and tailor them to your business, your market, and your goals.
By Joel Conner October 11, 2023
Having A Clear Plan Can Make All The Difference!
By Joel Conner August 9, 2022
There are many ways to deliver value to your audience!